Showing posts with label DIY. Show all posts

Sunday, August 17, 2025

Back-to-School with Party and Parlour!


Back-to-School has been a whirlwind this year!  My son started high school last week, right after we returned from a last minute trip to Nashville, and now we're trying to get back into the swing of routine.  Are your kids back in school, or are you still in summer mode?  

I absolutely LOVE this Pink Eraser Surprise Pouch printable from Party and Parlour!  There is still time to whip these up, even if your kids have already returned, and just need a fun little treat to keep them motivated.  They don't take long to make at all, and you can fill them with candy, healthy treats, small school supplies, or whatever!  The printable eraser gift tags are adorable as well, and you can keep them on hand for teacher appreciation gifts.  Ohhh, did you notice the cute washi tape too?  ...and Crayon Treat Boxes?

Saturday, February 22, 2025

DIY Candy Bow Cupcake Toppers


Hello there, bowtiful!  If you are like me, and haven't mastered the art of piping bows on a cake with frosting,  and are always hoping to make a big impact in a short amount of time, then you'll love these easy candy bows that will transform your cake or treats in a jiff!  They are so much more forgiving, since you can move them around before applying them to the frosting.  I used them on my store-bought Valentine's Day cake, and I just wanted to share the tutorial.  They can be used for many different occasions and themes, so you know what they say -- when in doubt, put a bow on it!


WHAT YOU NEED:

Tootsie Fruit Chews in Assorted Reds (2 per bow)

• Microwave (not pictured)

• Wax Paper

• Kitchen Scissors

HOW TO:


Step 1

Wash your hands!  Unwrap two fruit chews, and place them on a small piece of wax paper in the microwave.  Heat in five-second increments until the chews are warm enough to mold with your hands.  (I heated mine for about 7-10 seconds.)

Step 2

If both chews are the same color, roll them together into one ball, and if you are using two different colors, roll them into two separate balls.  (NOTE:  If you want the bow to have a yarn-like appearance, you will want to roll the chews into two separate balls no matter what colors you have chosen.)  Rub them between your hands to form a "snake" out of each ball.


Step 3

If you are going for the yarn-ish look, twist your two strands of candy together.


Step 4

Create a loop on one side of the "rope", with a tail hanging below.


Step 5

Create a second loop on the other side of the rope, and place the tail over the center of the first loop and tail.  Squeeze together in the middle a bit to keep the bow in place.  


Step 6

Use kitchen scissors to snip the end of each tail at an angle.


Voila!  You have an adorable candy bow!  You can place it on a cupcake, the top and/or sides of a cake, or just put it on a little plate for a cute after-school treat.  TIP: Store in a cool place so the bows keep their shape.  Also, wait until the day you plan to serve the cake to place bows on the side.  They may begin to slide down if left overnight, depending on the type of frosting.  I would love to know what you do with your bows, so please do share!  ...or tag me on Instagram.  Thanks!

Tuesday, November 22, 2022

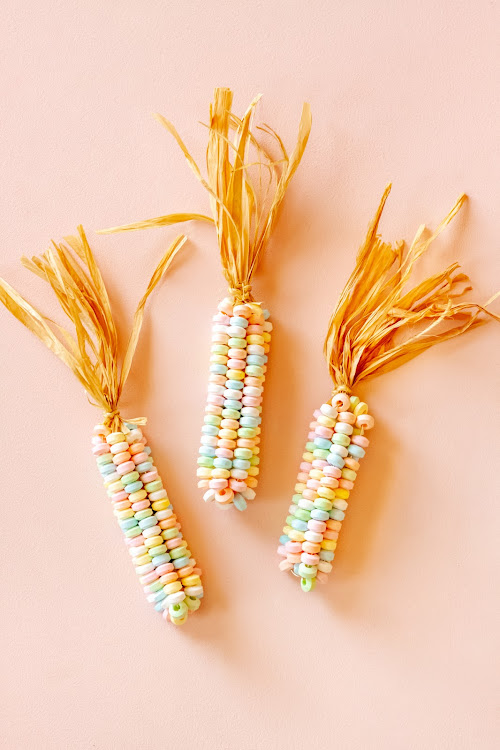
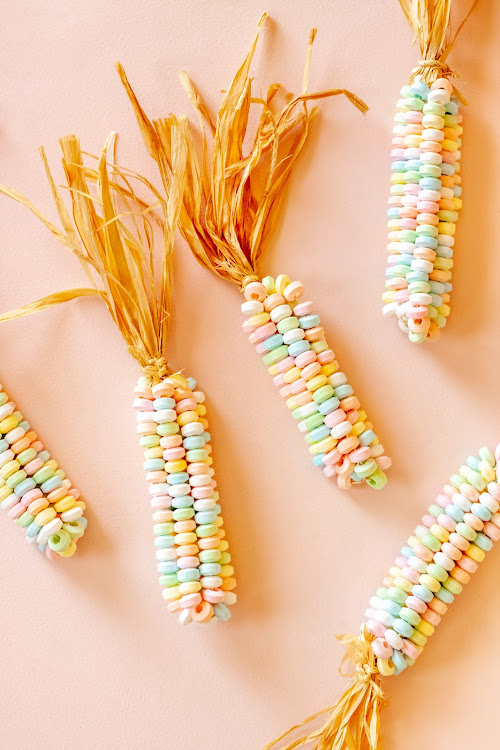
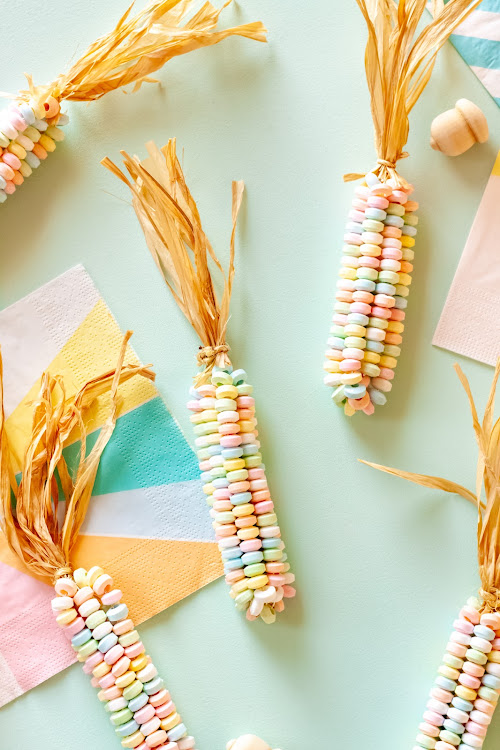
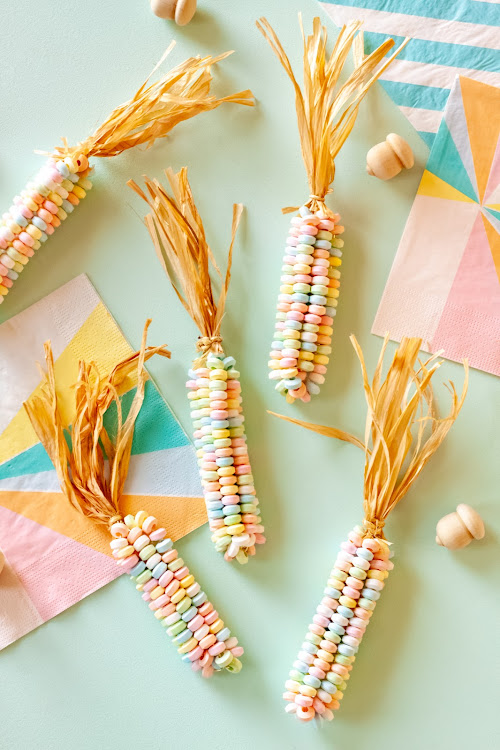
Candy Calico Corn

Ahhh, can you believe this is Thanksgiving week?  If I’m honest, I started listening to Christmas music on November 1st, but there is so much to be grateful for this year, and sometimes I forget to stop and reflect on all the good things.  I am beyond grateful for strong friendships.  At twenty-four years old, I remember worrying about choosing the right bridesmaids.  I wanted to pick friends who would still be in my life in twenty years, and I’m happy to say that the friends I chose are my closest friends to this day!  I talk to a couple of them almost daily, and treasure them even more today than I did 20+ years ago.  We have walked through many seasons of life together (good & bad), and it feels like I wouldn’t have survived some of them without these ladies by my side.  I didn’t mean for this post to turn into a tribute to girlfriends, but I’m just SO grateful for them, and I hope they know it!  I treasure the new friends I have made along the way as well.  What are you most grateful for this year?


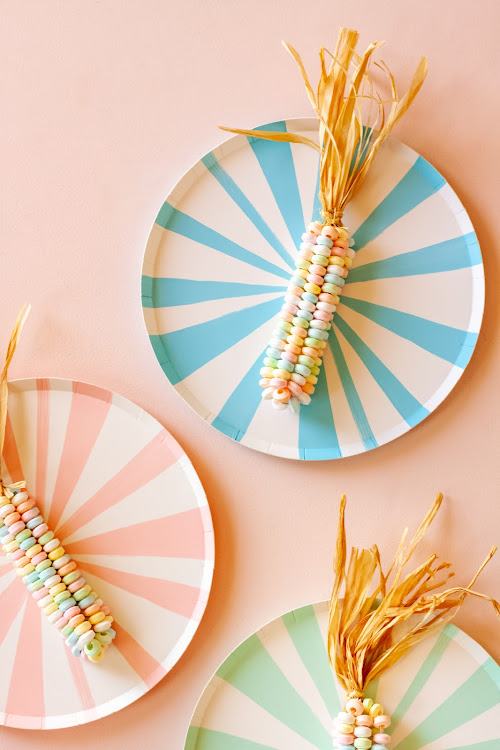
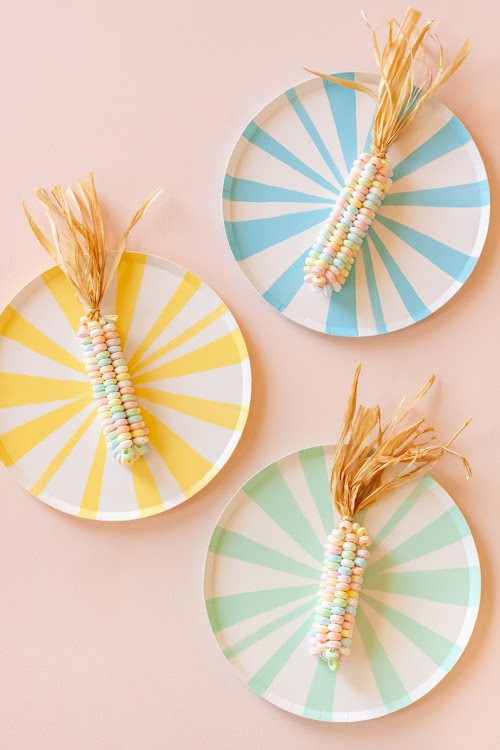
I wanted to share this pastel calico corn I made using candy bracelets for a fun little Thanksgiving DIY for the kids.  They’re so easy to pull together once you have the supplies, that I made five of ‘em while watching a few episodes on Netflix!  I hope you have a wonderful Thanksgiving and that you are able to take time to relax and reflect.  Here’s a little tutorial for the calico corn!


WHAT YOU NEED:

Candy Necklaces

18 Gauge Wire

Natural Raffia

Natural Jute Twine

Scissors

HOW TO:

Step 1

Cut the candy beads off the necklaces, and place in a bowl. 

Step 2

Cut about a 12 inch piece of wire, and bend in half.  String the candy beads onto the wire, leaving about 1 1/2 inches at the top on each side. 

Step 3

Carefully hold the wire together at the top to keep the beads in place, while wrapping a second wire around the center of the first.  Make the second wire slightly longer than 12 inches, since it will lose length when you wrap it around the first.  Add candy beads to the second wire leaving space at the top again.

Step 4

Repeat the steps with one more wire, until you have six pieces of wire sticking up.  Twist the 6 wire ends together at the top, and fold over to keep any loose ends from poking anyone. 

Step 5

Cut a small bundle of raffia to about 4 1/2 inches long, and use a short piece of hemp string to tie it around the wires at the top of the “corn”.  You may cut the string down if it hangs too much. 

TIP:  Be sure to help younger kids untwist the wires, and release the candy for them. 


Happy crafting and Happy Thanksgiving!

Monday, September 19, 2022

Halloween Moon Pouch Favors

These moon pouches are a simple, paper plate DIY for a fun Halloween craft, class party, or cute favor, and you could even use these Oh Happy Day plates if you want to skip the painting!  Find the full tutorial here.  Happy Halloween!  

Wednesday, August 24, 2022

DIY Back-to-School Cupcake Toppers


Are your kiddos back in school?  It's never too late to celebrate with a few friends, cupcakes, and a quick DIY!  These pencils and apple cores are made from mini honeycomb balls found at Oh Happy Day, and they could also be fun for teacher appreciation or graduation.  Here's the link for my LTK shop, where you will find all the supplies you need to make these cuties.  Happy Back-to-School!  

Monday, August 8, 2022

Backpack Piñata for Back-to-School


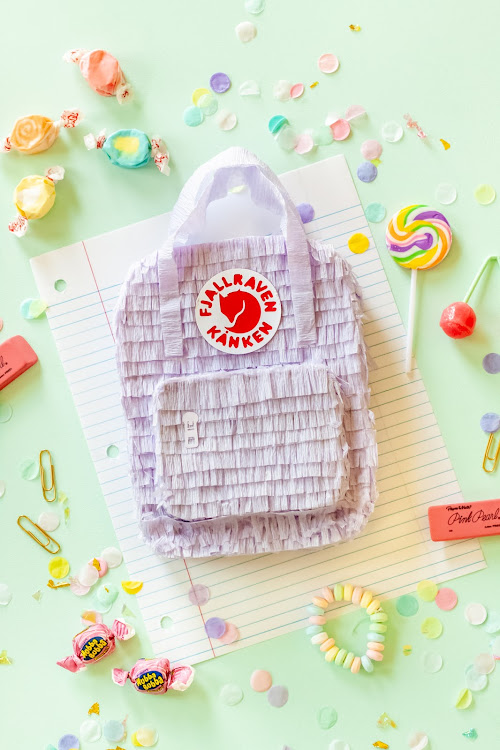
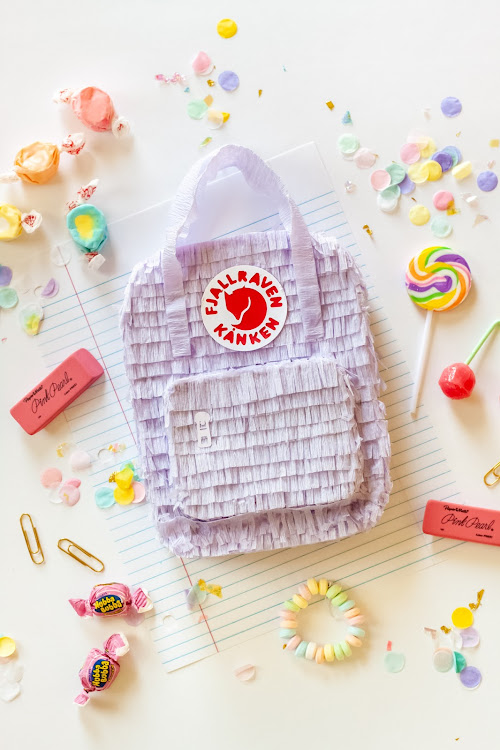
Happy back-to-school, friends!  I just wanted to share this Kanken backpack piñata I made over the weekend.  I thought of these a while back, and wasn't sure I was going to be able to pull it off in time.  So glad I did, because it's so fun to gift some back-to-school supplies and treats on the first day of school.    

We go back Wednesday, and I have a Senior in High School, and a 6th grader.  Big year here!  I saw a girl graduate on tv yesterday, and it made me bawl my eyes out.  Any tips for surviving the last year, Moms?  What grades are your kiddos entering?  

Wishing everyone a great week, whether you're returning to school, or wrapping up summer break!

PS I couldn't decide between the mint green and white background, so I'm sharing both.  :) 

Wednesday, May 4, 2022

DIY Mini Stick Horse Piñata


It's Derby week here in Kentucky, and it's time to make some stick horse piñatas!  These are perfect favors for the kiddos, and you could even have a fun little race with them!  They could work for a pony party as well.  You can find the tutorial here, in the Handmade Charlotte archives.  

Friday, April 29, 2022

DIY Oh Happy Day Plate Backdrop

Happy Friday!  If you have some leftover Oh Happy Day Plates lying around, throw a party with this fun DIY backdrop.  I love finding simple ways to cover a large area in pattern and/or color, without breaking the bank.  This one can be done in any color scheme...like, how about red, white, and blue for Memorial Day or 4th of July?  Throw a little pink in there too!  Pink is the new neutral!  If you create this wall, I would love to see it, so be sure to share.  If you would like to receive 10% off your Oh Happy Day purchase, use code ABIGAIL41680.  Enjoy your weekend! xo


SUPPLIES

Oh Happy Day Plates (Rose, Neon Rose, Coral, Neon Coral, Happy)


Pencil


OH HAPPY DAY! shop has beautiful party cups and napkins to coordinate with your backdrop colors. Don't forget to use code ABIGAIL41680 for 10% off your purchase.     

Wednesday, April 20, 2022

Earth Day Globe Favors


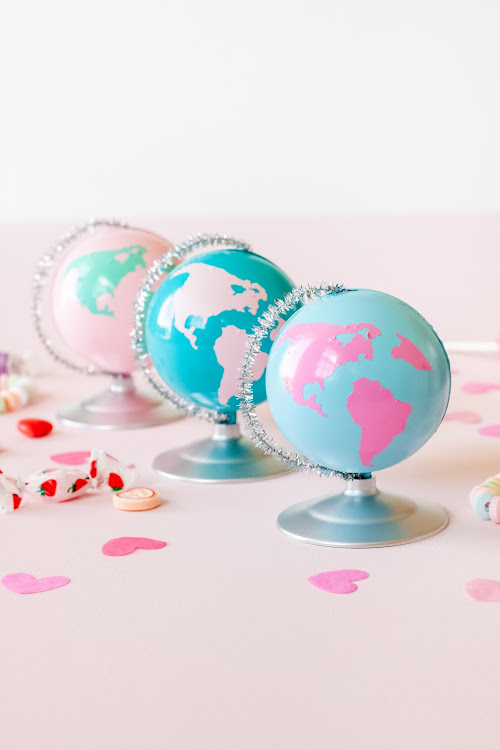
Do you celebrate Earth Day?  It's on April 22, and if I'm honest, I don't usually do anything - but this year, I think I will be sharing these globe containers I made for Valentine's Day!  They're perfect for both occasions.  You can find the tutorial here, and I will link the supplies below.

Plastic Ball Containers

Plastic Wine Glass Base

Silver Spray Paint

Colored Spray Paint

Silver Pipe Cleaners

Adhesive Vinyl Sheet

Cricut Cutting Machine

If you have any questions about the tutorial, feel free to leave a comment.  Happy Earth Day!

NOTE:  I may make a small commission if you purchase from the links - so thank youuuu!

Saturday, April 16, 2022

DIY Honeycomb Flowers


Happy Easter friends!!  I can't believe that it's tomorrow already.  We haven't even decorated eggs yet!  I have gathered everything for Easter baskets though.  How will you be celebrating?  You can make these DIY honeycomb flowers with mini honeycomb balls and a glue gun.  I will link the supplies below.  In full disclosure, I may make a small commission if you shop my links.  Thank youuuu!  :)  


Create this look:

If you have any questions about making the honeycomb flowers, feel free to comment below.  Happy Easter!

Tuesday, April 12, 2022

DIY Carrot & Cabbage Cake Toppers


If you're into gardening, or love a unique Easter theme, then be sure to make some carrot and cabbage cake toppers!  You'll just need some mini honeycomb balls, scissors, crepe streamers, toothpicks, and a glue gun.  Oh, and these pair well with grid napkins and plates from one of my favorite party shops!  Happy Easter friends!

NOTE:  Because I want to be transparent, I wanted to let you know that if you do shop any of the links, there is a chance I would make a small commission.  xo

Tuesday, March 15, 2022

DIY Shamrock Party Cups


Aren't you in love with the rainbow plates from Oh Happy Day shop?!  I adore them.  For St. Patrick's Day, you can use this giant heart confetti to make shamrocks on party cups, and you'll have the cutest tablescape.  What are your traditions for the 17th?         


Monday, March 14, 2022

DIY St. Patrick's Day Backdrop


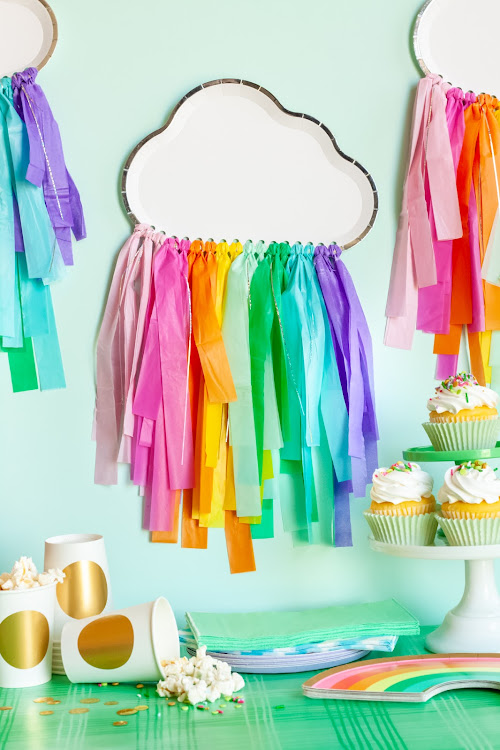
Cloud plates from Oh Happy Day shop are "cirrusly" cuuuute!  They make the perfect party backdrop with a rainbow of plastic tablecloth streamers.  How will you be celebrating on March 17th?  


Happy St. Patrick's Day!

PS Just to be completely transparent, if you do shop the links above, there is a chance I would make a small commission.  xo 

Saturday, March 12, 2022

DIY Shamrock Piñata


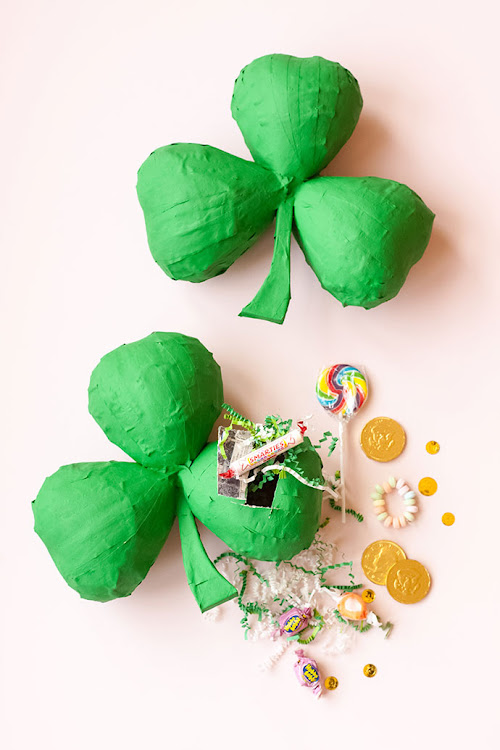
Happy (almost) St. Patrick's Day!  I realized the holiday is coming up quickly, and I have a number of projects to share before the seventeenth.  The tutorial for these shamrock piñatas can be found at Handmade Charlotte.  Enjoy your weekend!  What do you have planned?  We went from 60 to 70 degree weather, to having a few inches of snow on the ground! 

Friday, February 11, 2022

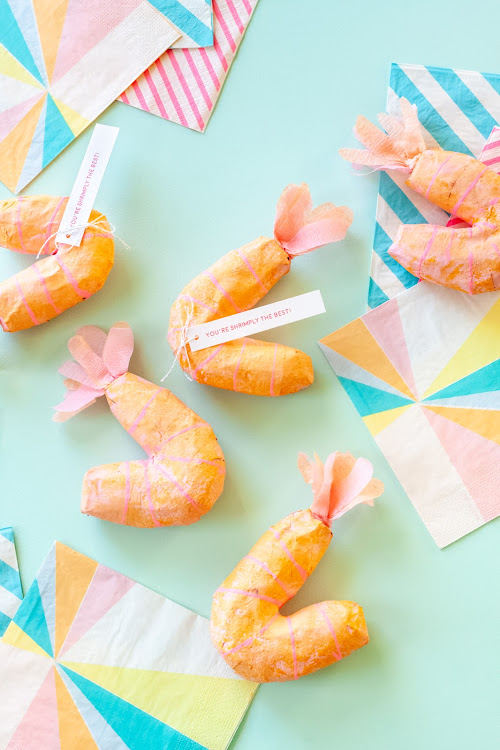
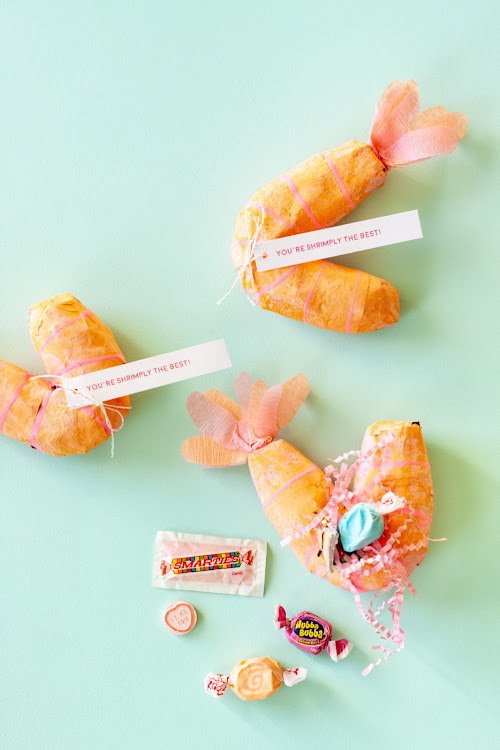
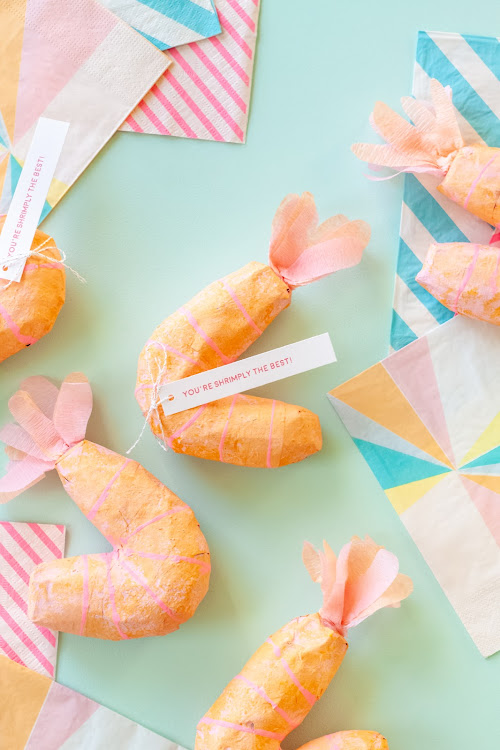
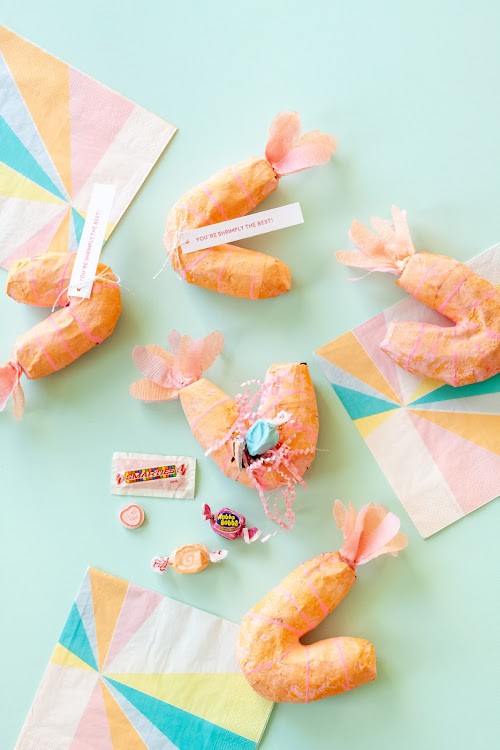
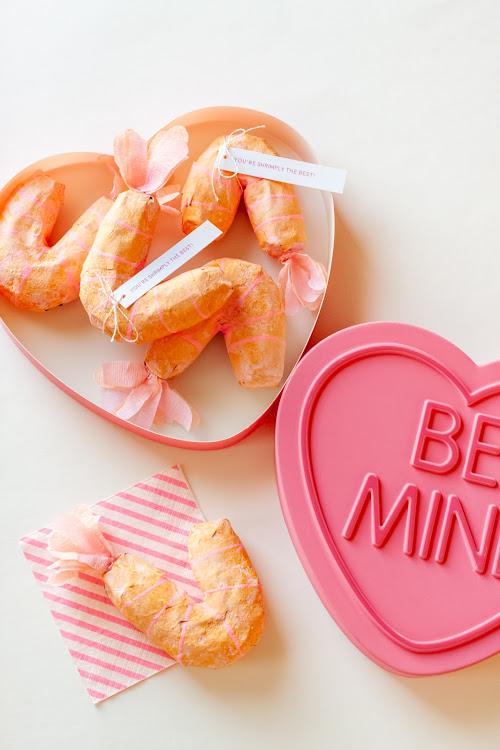
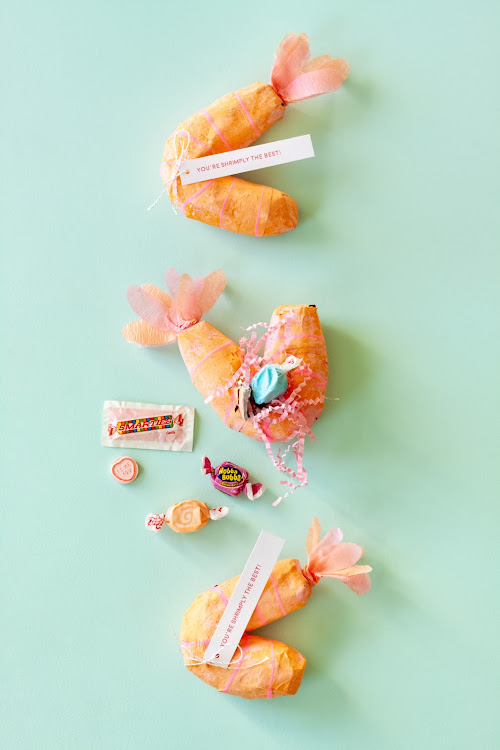
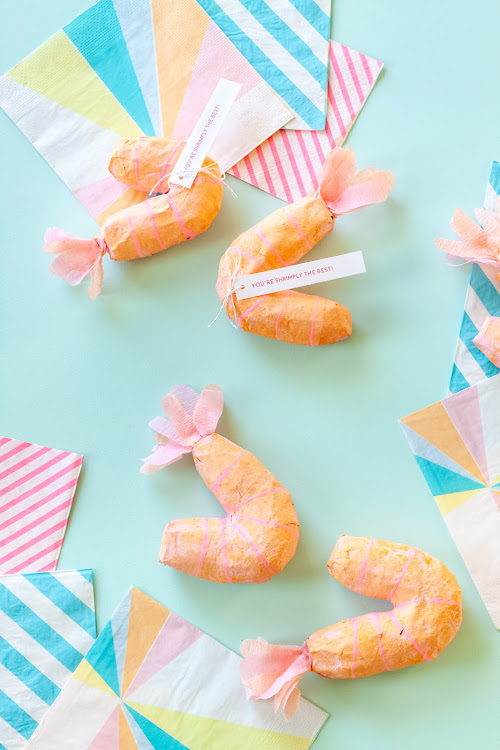
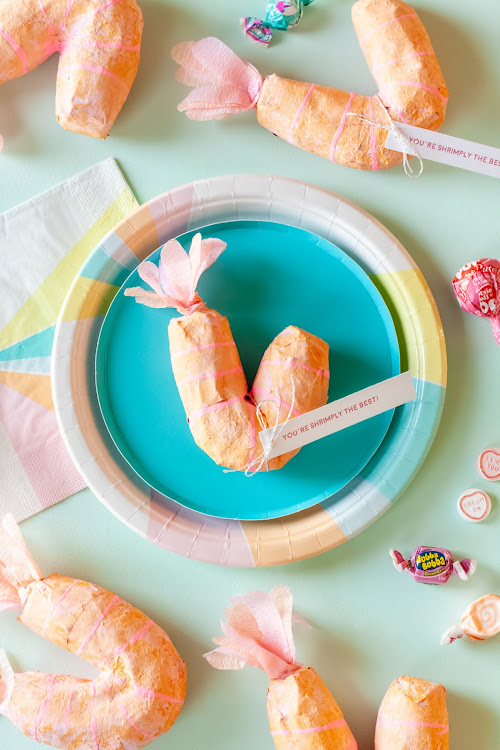
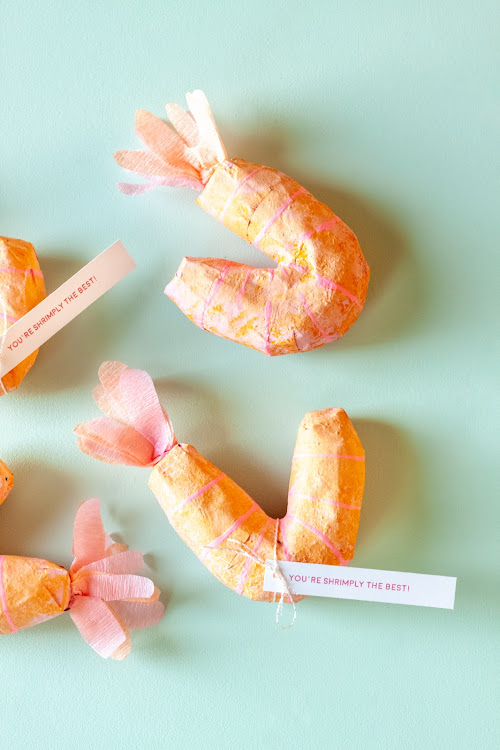
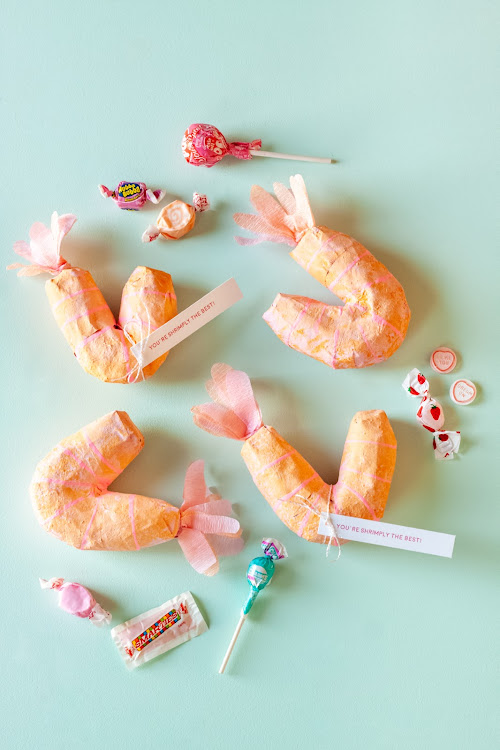
"You're Shrimply the Best" Valentine Shrimp Piñatas

You are “shrimply” the best!  I have always wanted to try making shrimp piñatas, and adding a little pun made these perfect for Valentine’s Day!  It would be so fun to host a seafood or sushi night for Galentine's and send the girls home with some piñatas filled with chocolates…or just make one for your love and go out to your favorite sushi restaurant.  If you have a mini sushi lover, it would be an adorable birthday theme!  Be sure to check out these sushi favors as well.


SUPPLIES:

• Twisty balloon

• Balloon pump

• Clear tape

• Newspaper strips

• Paper mache paste (1 c water, 1 c flour)

• Scissors

• Acrylic paint in peach + pink + hot pink

• Sponge brush

• String

• Paper plate

• Mesh loofah sponge

• Party streamers in peach + pink

• Hot glue gun

• Box cutter

• Valentine candy and/or favors

HOW TO:

Step 1

Use a balloon pump to blow up your twisty balloon to about 8 inches long.  You really have to blow up the entire thing, and then let out some air to get to your desired length.  Use a long piece of tape to hold the ends together.  Leave a decent length of tape in between the two ends to curve the balloon like shrimp, without allowing the ends to touch. 

Step 2

Dip newspaper strips in paper mache paste, and wrap the balloon in a few layers, starting in the center, and working your way up to the pieces of tape.  Allow to dry. (Overnight would be ideal).

Step 3

Remove the tape from the balloon and cover the ends in newspaper strips dipped in paper mache paste and allow to dry.  It is best to place newspaper strips in an “x” around the ends, and then wrap horizontally down the sides. 

Step 4

Paint the shrimp body in pink, and then place the pink and peach paint colors on a paper plate.  Dip your mesh loofah sponge in both paint colors, and dab it all over the shrimp, until you have a nice, varied pinkish-peach color.  Allow to dry.

Step 5

Place some hot pink paint on a paper plate, and hold a string at each end, and dip it in the paint.  Wrap the string around the shrimp body in multiple places, about an inch apart.  Allow to dry.

Step 6

Layer about 2 ½”-3" long pieces of pink and peach party streamers and cut a tail shape with scissors.  Fan them out a bit, and bunch them up at one end.  Use a glue gun to attach them to the end of the shrimp body. 

Step 7

Use your box cutter to cut three sides of a rectangle on the back of the shrimp, to make a little door for placing the candy and favors.  Take out the balloon and shake out any dried paper mache flakes over a trash can, and then fill with favors. 


Happy crafting, and Happy Valentine’s Day!