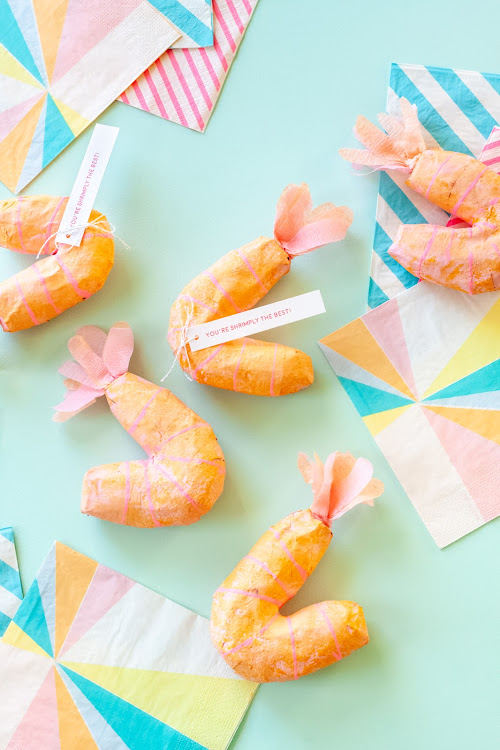
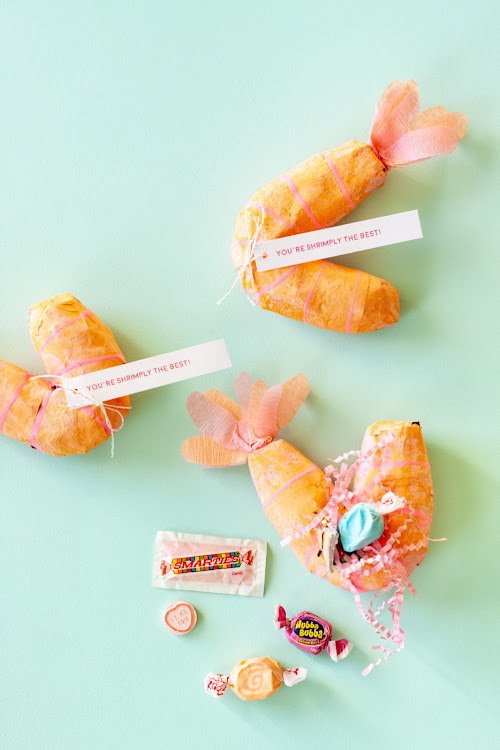
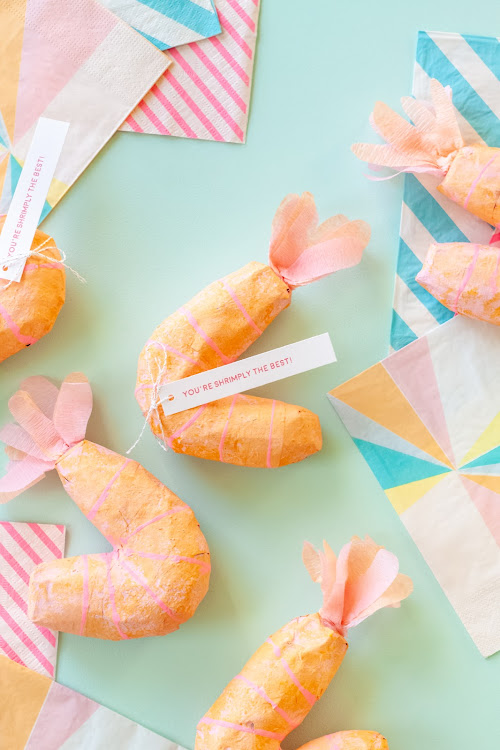
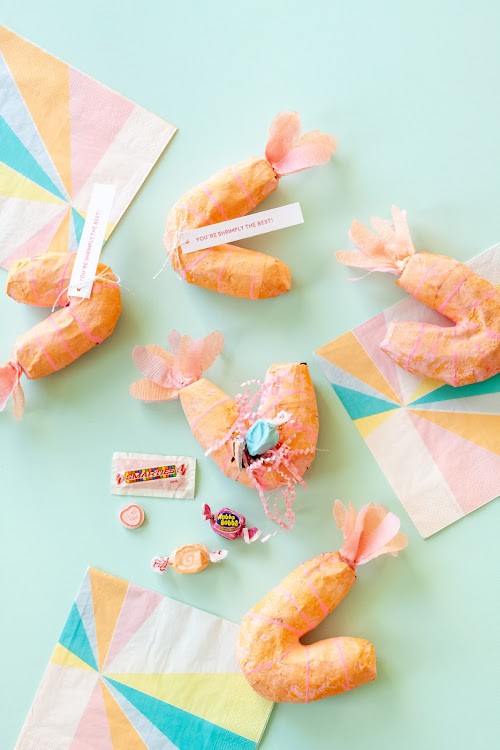
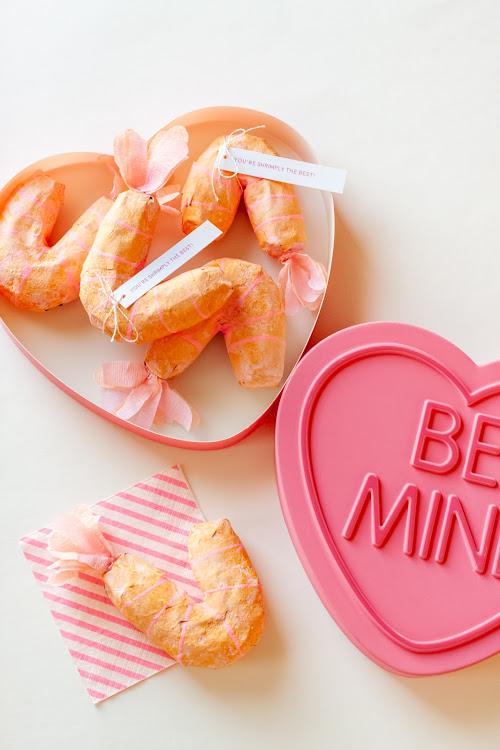
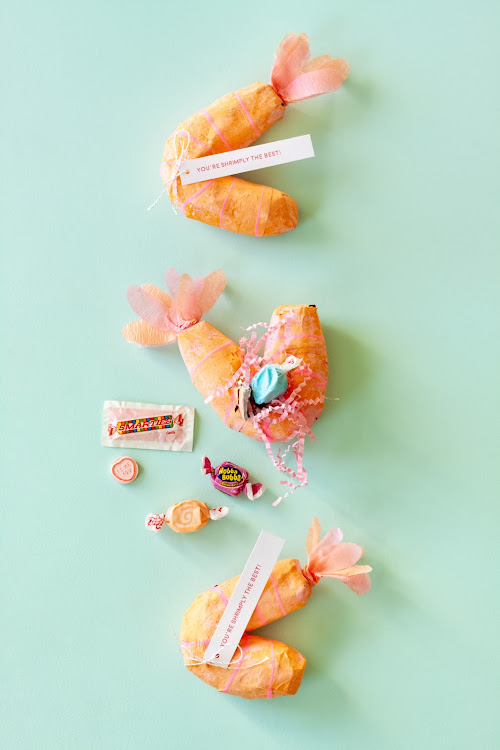
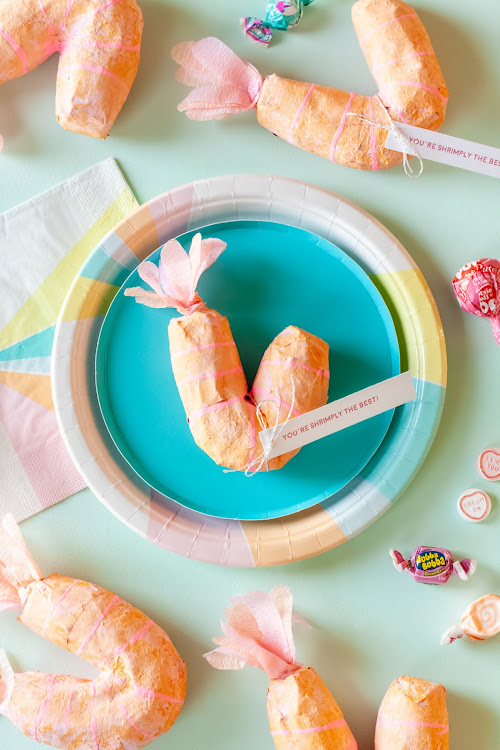
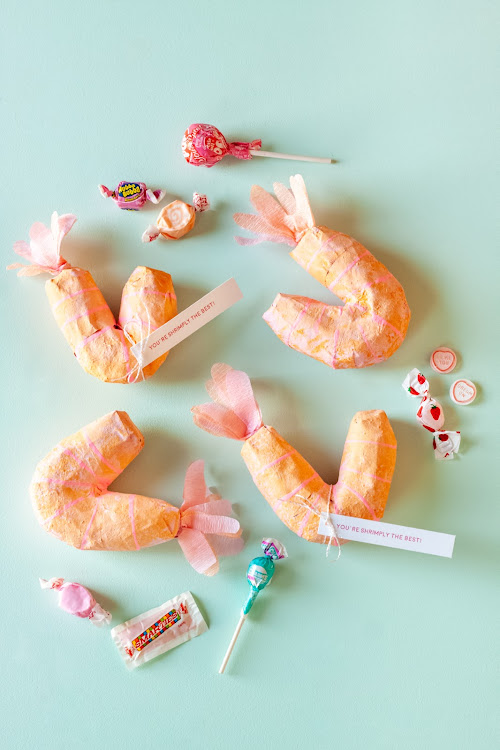
Showing posts with label teens and tweens. Show all posts

Monday, October 17, 2022

Confetti Club : Happy Mail


Hello confetti lovers!  If you're new to Confetti Club, be sure to check out the intro post here.  I just wanted to follow up with a tiny tip for mailing your contributions.  People love to get personal mail no matter what, but it's even MORE fun when the packaging is pretty, right?!  

When you divide your confetti for sending to club members, I recommend some clear cellophane bags that you can fold over a couple times at the top, or you could get the kind that zip.  Seal them with some fun Washi tape or stickers.  There are a bunch of fun options on Etsy!  

Lastly, if you have a label maker, you could personalize each bag with members' names.  I bought some pink tape on Amazon.  Obviously, embellishments are not necessary - just fun!

The best thing about Confetti Club is that you can just stick it in an envelope - no box or post office necessary!     


If you start your own Confetti Club, be sure to share pics of your mixes, and tag @fetegazette on Instagram or Facebook.  I would LOVE to see what you come up with and share inspiration.  Let's use #fgconfetticlub and spread the word!

Wednesday, September 28, 2022

Confetti Club : Intro & Inspo


Welcome to Confetti Club!  I don't know about you, but every time I receive a package in the mail, it really makes my day...especially when it's something I ordered from a party shop.  I literally feel like a kid on Christmas morning!  One of my favorite items to use for special occassions, parties, or photos is definitely CONFETTI.

Currently, my favorite tissue confetti has to be anything Studio Pep, and most of the online party shops carry a few mixes.  While I adore the confetti alone, I started adding a few pinches of extra confetti, glitter and mylar to personalize it for specific holidays or themes. 

I started thinking, "how fun would it be to get some friends in on collecting items for confetti mixes, and everybody gets to give and receive some HAPPY MAIL?!"  I mean, this could become a monthly thing...or quarterly??  You could just do it for all the major holidays, or include seasons, birthdays, and other relevant events.  Most of my mixes use about four different items, so invite three friends to join your club.

To get started...

1.  Decide how often your members will create mixes.  You may need a President to send reminders each month or quarter!

2.  Choose your first theme and/or color scheme, and assign confetti / glitter types, or you could take a chance and just see what each person contributes.  

NOTE:  I would recommend taking turns purchasing the different types of glitter and confetti, since the cost may vary.  Once you have a nice collection of mylar and stars, you can all just focus on theme-specific additions.  

3.  Decide on a date for each member to agree to have their contributions in the mail.  

4.  Each member will purchase an item for the mix, and divide it into four (or the number of club members).  Package each pile, and send it along to all members.  (More on this in the next post...)

5.  Wait to receive a variety of items from other members, and then combine for a fun confetti mix!

Another idea is to have each member get their own "starter kit", including gold, silver and iridescent mylar, as well as silver and gold star confetti.  Then, happy mail can just include tissue confetti, glitter, and other shapes depending on the holiday or season.       


SPOOKY MIX
bat glitter (similar item)


HAPPY MIX


DAYDREAM MIX
heart shaped confetti (similar item)


UNICORN MIX

If you start your own Confetti Club, be sure to share pics of your mixes, and tag @fetegazette on Instagram or Facebook.  I would LOVE to see what you come up with and share inspiration.  Let's use #fgconfetticlub and spread the word!

Monday, August 8, 2022

Backpack Piñata for Back-to-School


Happy back-to-school, friends!  I just wanted to share this Kanken backpack piñata I made over the weekend.  I thought of these a while back, and wasn't sure I was going to be able to pull it off in time.  So glad I did, because it's so fun to gift some back-to-school supplies and treats on the first day of school.    

We go back Wednesday, and I have a Senior in High School, and a 6th grader.  Big year here!  I saw a girl graduate on tv yesterday, and it made me bawl my eyes out.  Any tips for surviving the last year, Moms?  What grades are your kiddos entering?  

Wishing everyone a great week, whether you're returning to school, or wrapping up summer break!

PS I couldn't decide between the mint green and white background, so I'm sharing both.  :) 

Friday, February 11, 2022

"You're Shrimply the Best" Valentine Shrimp Piñatas

You are “shrimply” the best!  I have always wanted to try making shrimp piñatas, and adding a little pun made these perfect for Valentine’s Day!  It would be so fun to host a seafood or sushi night for Galentine's and send the girls home with some piñatas filled with chocolates…or just make one for your love and go out to your favorite sushi restaurant.  If you have a mini sushi lover, it would be an adorable birthday theme!  Be sure to check out these sushi favors as well.


SUPPLIES:

• Twisty balloon

• Balloon pump

• Clear tape

• Newspaper strips

• Paper mache paste (1 c water, 1 c flour)

• Scissors

• Acrylic paint in peach + pink + hot pink

• Sponge brush

• String

• Paper plate

• Mesh loofah sponge

• Party streamers in peach + pink

• Hot glue gun

• Box cutter

• Valentine candy and/or favors

HOW TO:

Step 1

Use a balloon pump to blow up your twisty balloon to about 8 inches long.  You really have to blow up the entire thing, and then let out some air to get to your desired length.  Use a long piece of tape to hold the ends together.  Leave a decent length of tape in between the two ends to curve the balloon like shrimp, without allowing the ends to touch. 

Step 2

Dip newspaper strips in paper mache paste, and wrap the balloon in a few layers, starting in the center, and working your way up to the pieces of tape.  Allow to dry. (Overnight would be ideal).

Step 3

Remove the tape from the balloon and cover the ends in newspaper strips dipped in paper mache paste and allow to dry.  It is best to place newspaper strips in an “x” around the ends, and then wrap horizontally down the sides. 

Step 4

Paint the shrimp body in pink, and then place the pink and peach paint colors on a paper plate.  Dip your mesh loofah sponge in both paint colors, and dab it all over the shrimp, until you have a nice, varied pinkish-peach color.  Allow to dry.

Step 5

Place some hot pink paint on a paper plate, and hold a string at each end, and dip it in the paint.  Wrap the string around the shrimp body in multiple places, about an inch apart.  Allow to dry.

Step 6

Layer about 2 ½”-3" long pieces of pink and peach party streamers and cut a tail shape with scissors.  Fan them out a bit, and bunch them up at one end.  Use a glue gun to attach them to the end of the shrimp body. 

Step 7

Use your box cutter to cut three sides of a rectangle on the back of the shrimp, to make a little door for placing the candy and favors.  Take out the balloon and shake out any dried paper mache flakes over a trash can, and then fill with favors. 


Happy crafting, and Happy Valentine’s Day! 

Saturday, June 2, 2018

Sushi Surprise Party Favors


Turn sweet treats and streamers into some adorable "sushi surprise" for a fun dessert or favor.  Find the full tutorial at Handmade Charlotte.  Happy weekend!

Sunday, September 10, 2017

Mini Letter Board Invitations


Alphabet pasta noodles can be used to make the most adorable mini letter boards!  You can use them as party invitations, room decor, magnets, etc. Follow the tutorial at Handmade Charlotte, and I would love to know how you are going to use your letter board!